Apple certificates and provisioning profiles

I'm a software developer passionate about creating cool code, learning new things and helping others 👩💻
If you have ever developed an iOS app, or even started learning about it, then you must have been a bit (or a lot) confused about the process of app provisioning. I know for sure I was. So that’s why I decided to write this article explaining what in fact are these certificates and profiles, why we need them and a step by step tutorial of how to create and use them. And hopefully it will help some lost fellow out there who’s trying to find a point to this mystic process.
So let’s dive into this! 👩💻
What are Apple certificates and provisioning profiles and why do we need them?
The certificate is a digital identification you use to sign your iOS apps for development and distribution. The main part of the certificate is your public/private key pair, which is a guarantee that the apps are truly developed/distributed by you. You've probably realized by now that you can't install any app on an iOS device. It needs to be signed by Apple first and that's why we need the provisioning profiles. You can see them as a link between the device and the developer account.
And if you’re wondering why is Apple requiring all of this? Well, because they are really focused towards providing secure devices. That's why their developers need to be registered, sign their apps and have them reviewed by Apple before any distribution. This is the process they came up with as a way to keep the security on a high level but still be accessible.
Creating and using the certificates and provisioning profiles
In order to create or use an existing certificate or provisioning profile login to your Apple developer account and you should see the homepage for your Apple developer program account. Navigate to Certificates, Identifiers & Profiles.
Note: every certificate and provisioning profile have an expiration date, so it’s really important to check it before using any.
Creating a certificate:
In the certificates section you’ll see all of the current certificates that are made under that developer program. There are two types of certificates: Development and Distribution. The development one is used when you want to install the app using XCode (when developing an app), and the distribution one is used for distribution of the application (TestFlight/AppStore). If you want to use a current certificate then you can select it and download it, but you would also need to obtain the private key from the developer who created the certificate.
📎 Steps for creating a new certificate:
- select the plus icon and choose the type of certificate you need (distribution/development) and the type of service - if you have any
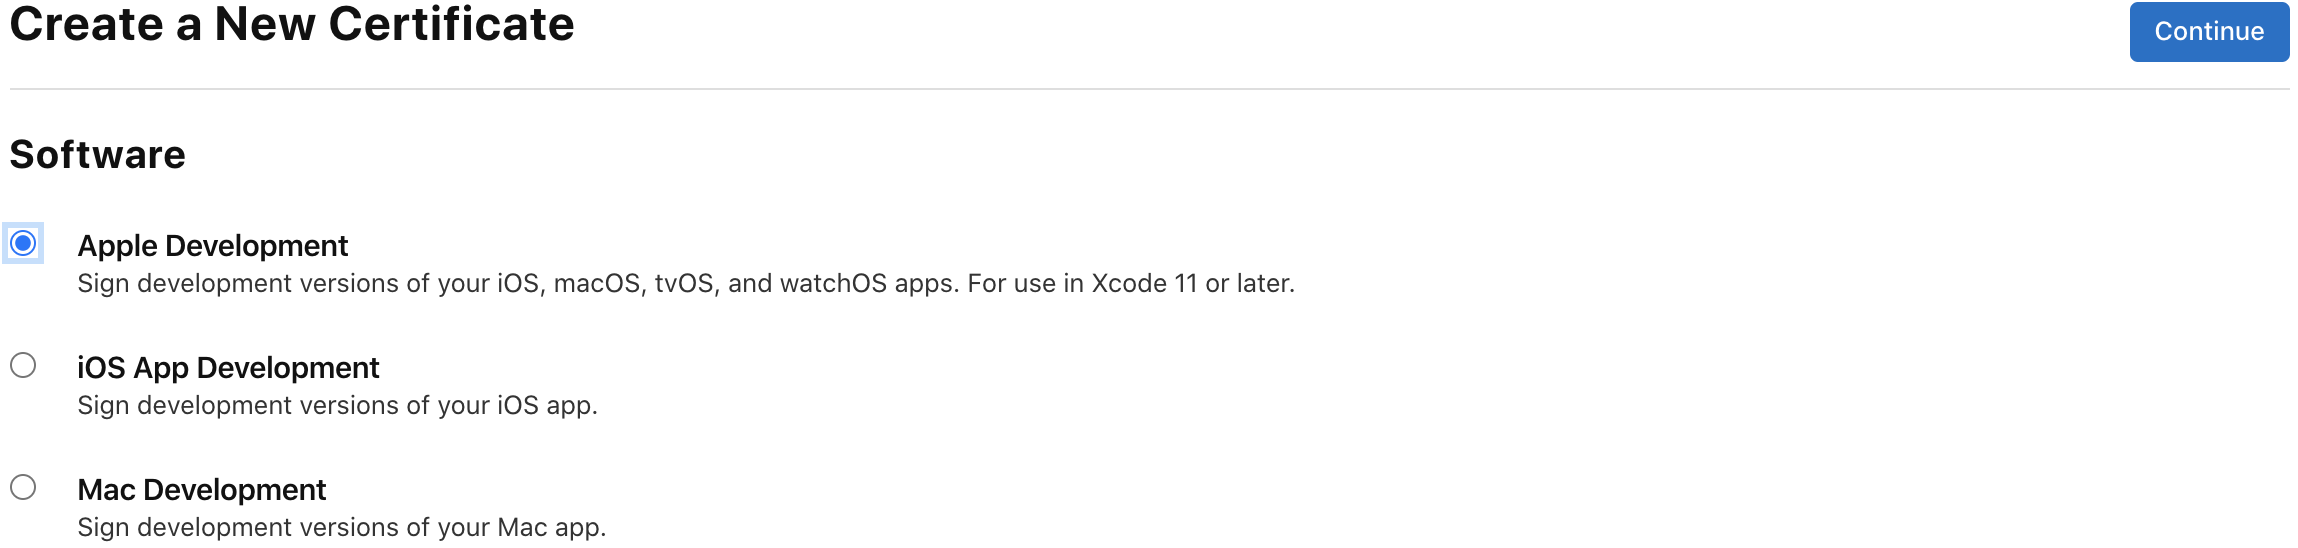
- click continue and you will be navigated to a page where you need to generate a Certificate Signing Request (CSR) file from your Mac. To create a CSR you need to follow these steps:
Launch Keychain Access located in /Applications/Utilities.
Choose Keychain Access > Certificate Assistant > Request a Certificate from a Certificate Authority.
In the Certificate Assistant dialog, enter an email address in the User Email Address field.
In the Common Name field, enter a name for the key (for example, Gita Kumar Dev Key).
Leave the CA Email Address field empty.
Choose “Saved to disk”, and click Continue.
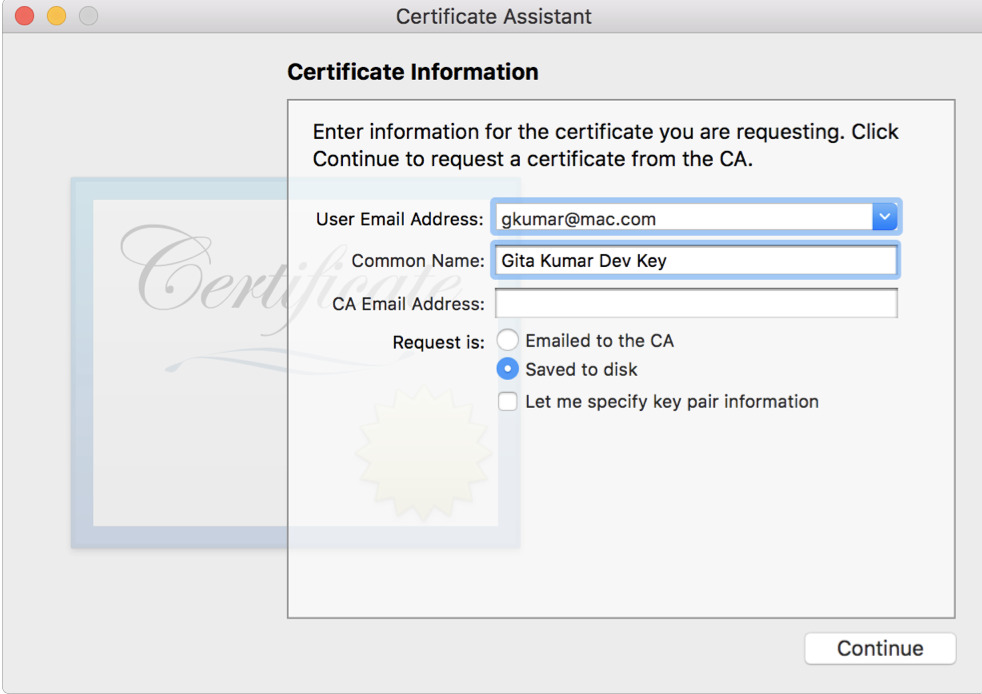
This example was taken from official Apple guide
You can now save the request and add it to the request field. After this the certificate is created and you can download it. Find the downloaded certificate, double click on it and it should now appear in your Keychain.
The last step depends on whether the certificate is a distribution or development one.
- Development certificate - you need to add it to your Keychain and in the Debug configuration of your project in the development environment that you use.
- Distribution certificate - you also need to add it in your project but under Release configuration (iOS bundle signing -> signing identity). Additionally, you will need to add the installation of the certificate as a task in your build pipeline (ex. Azure DevOps) before building the project. To do this, first you need to export the certificate from Keychain. Find the certificate in Keychain, right click on it and select export. It will require you to set a password for it, be sure to keep it somewhere because you’ll need it! Next, add the exported certificate with a .p12 format in the repo of the project and add it in the pipeline as well. Next, enter the password and the certificate signing identity (same as the name of the certificate in keychain). One last step is to go in the Build project task in the pipeline and add the same certificate signing identity in the Signing identity field
Creating a provisioning profile:
The next thing we need to do if we want to develop or distribute our app is create a Provisioning profile (specific for the certificate that we just created). Each provisioning profile stores the following: certificate, an App ID (two-part string used to identify one or more apps from a single development team) and unique device identifiers (list of devices that the app can run on).
Go back to Certificates, Identifiers & Profiles and under Provisioning profiles you will see all of the current profiles that are made under that Apple developer program. There are also two types of provisioning profiles: Distribution and Development. The development one is used for testing of the application, while the distribution one is used when we want to submit our app to AppStore/TestFlight. If you want to use a current profile then you can select it and download it.
📎 Steps for creating a new provisioning profile:
- select the plus icon and choose the type of profile that you want to create (development/distribution-app store or ad-hoc)
- next select an App ID - if you plan to use services such as Game Center, In-App Purchase, and Push Notifications, or want a Bundle ID unique to a single app, use an explicit App ID. If you want to create one provisioning profile for multiple apps or don't need a specific Bundle ID, select a Wildcard App ID. Wildcard App IDs use an asterisk (*) as the last digit in the Bundle ID field.
- in the next step choose what certificate and device/devices is this profile referred to
- name your profile, generate and download it
- after it is downloaded find it in your local storage and double click on it to install it in XCode - after successfully installing it you can add it in your project repo and in the project options under iOS Bundle Signing - Provisioning profile in your developing environment
The last step here also depends on whether the certificate is a distribution or development one:
- Development profile - you need to select it in your project options under Debug configuration, but be careful, the profile will only appear in the selection list if you have previously selected the certificate that this profile is created for
- Distribution profile besides adding it to the project options under Release configuration, you will also need to add the installation of the profile in your build pipeline (ex. Azure DevOps) before or after installing the certificate. To do this, you just need to select the profile from the project repo in the Provisioning profile field. Additionally, under the Build project task in the pipeline you will need to enter the Provisioning profile UUID which can be found in XCode or by right click on the profile and Get info.
As mentioned before the certificates and provisioning profiles have their expiration dates. After the expiration date has passed, you will need to create new ones in order to keep working on your app.
With all of this set you're ready to go and develop or distribute your iOS app! 📲